This post may contain affiliate links.
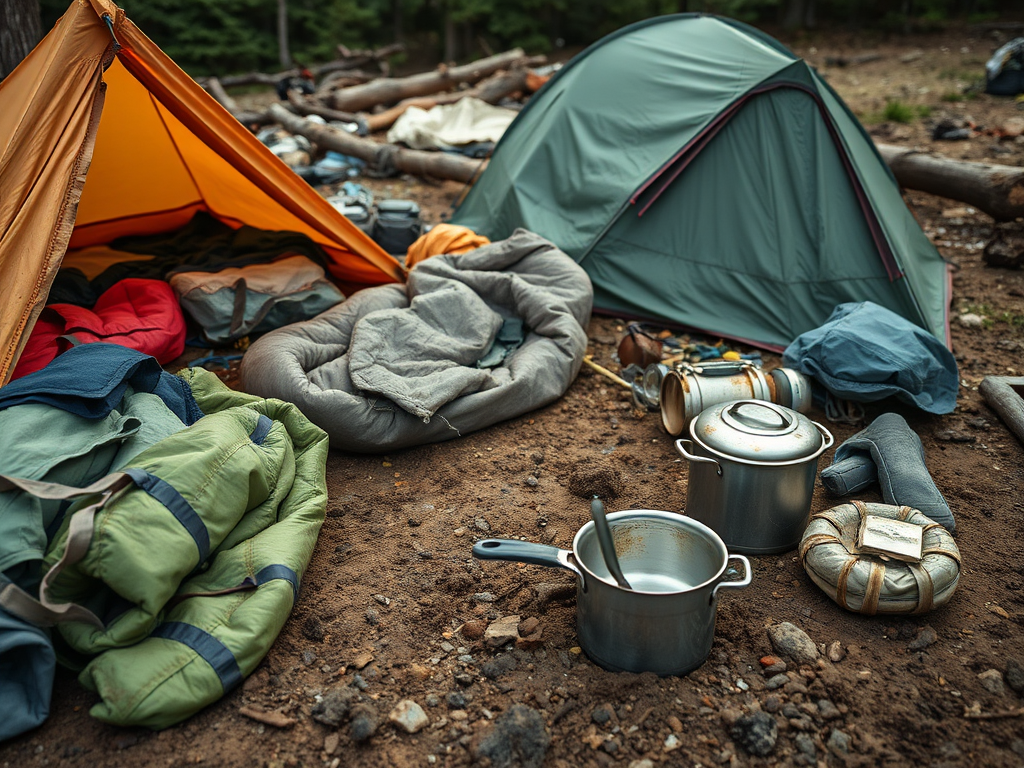
The end of camping season always sneaks up on me. One minute, we’re roasting marshmallows and brushing pine needles out of the tent; the next, the mornings feel a little too crisp, the sun sets too early, and it’s time to pack everything away.
And if you’re anything like me, “packing away” can quickly turn into a chaotic heap of half-dried gear, crumpled sleeping bags, and a faint whiff of campfire smoke that somehow lingers until spring. For years, I’d shove everything into bins and promise to sort it “later.” Spoiler: later never came.
It wasn’t until one particularly soggy spring trip — when I unrolled a tent that smelled like damp socks and defeat — that I realized: taking care of gear is part of the adventure. Keeping it clean, dry, and ready means fewer headaches, fewer replacements, and way more smooth starts to the next season.
Now, gear care has become my post-adventure ritual — slow, satisfying, and surprisingly peaceful. It’s not about being perfect or having a garage that looks like a catalog. It’s about making sure the next time we get the itch to go, we can grab our gear and go… without a week of scrambling and disinfecting first.
Here’s how I keep our family’s camping gear fresh and adventure-ready all year long.
Step 1: Unpack the Same Day (Even if You’re Tired)
The first step is the hardest: actually unpacking everything right when you get home.
I used to leave it for the “tomorrow me” who never had the energy, but that’s exactly how things get musty and forgotten. Dirt gets ground into tent floors. Moisture settles into sleeping bags. Food crumbs migrate into the weirdest corners of backpacks. And once that smell sets in? It’s hard to un-smell it.
Now I unload gear the same day, even if it’s just spreading it out in the garage overnight. I don’t aim for perfection — I aim for airflow. If everyone is exhausted, I tell myself: “Just get it out of the bags.” That alone prevents most of the grossness.
If you want a quick mental shortcut, this is my rule: if it touched dirt, sweat, water, or food… it doesn’t go straight into storage.
And yes — I’ve absolutely done the “throw it in the garage and close the door” move before. But future me always pays for it. So now I treat unpacking like the final step of the trip, not a separate chore that I’ll magically want to do later.
Step 2: Dry Everything Like You Mean It
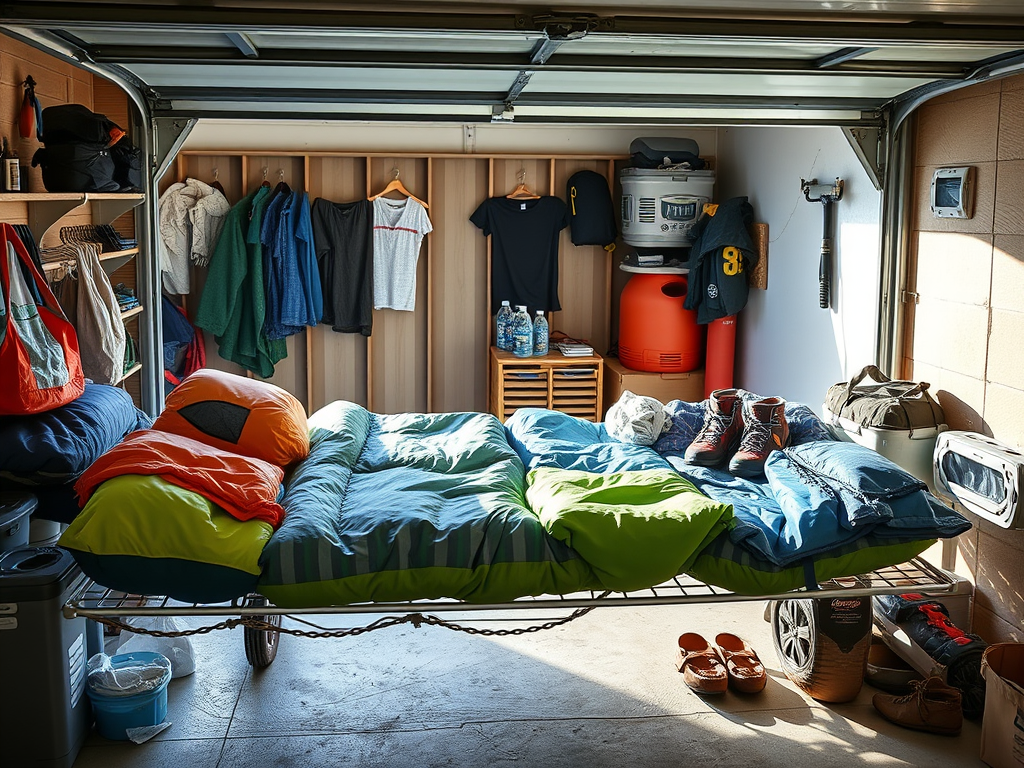
Anything that’s damp goes straight to the drying rack — like this mesh drying rack that folds flat when not in use but holds a surprising amount of stuff.
Sleeping bags, rain flies, wet towels, even hiking shoes all get a spot. The key is airflow. You want everything dry before it gets tucked away, or you’ll be growing a science project in your bin by next spring.
Here’s what I’ve learned the hard way: “mostly dry” is not dry. If it’s even slightly damp, you’re rolling the dice on mildew. And mildew doesn’t just smell bad — it breaks down fabrics and coatings over time.
If the weather’s nice, I hang items outside for a few hours to let fresh air do its thing. Sunlight is wonderful, but I’m careful with delicate materials (especially rain flies and waterproof coatings). A little sun is great; baking it for hours isn’t always.
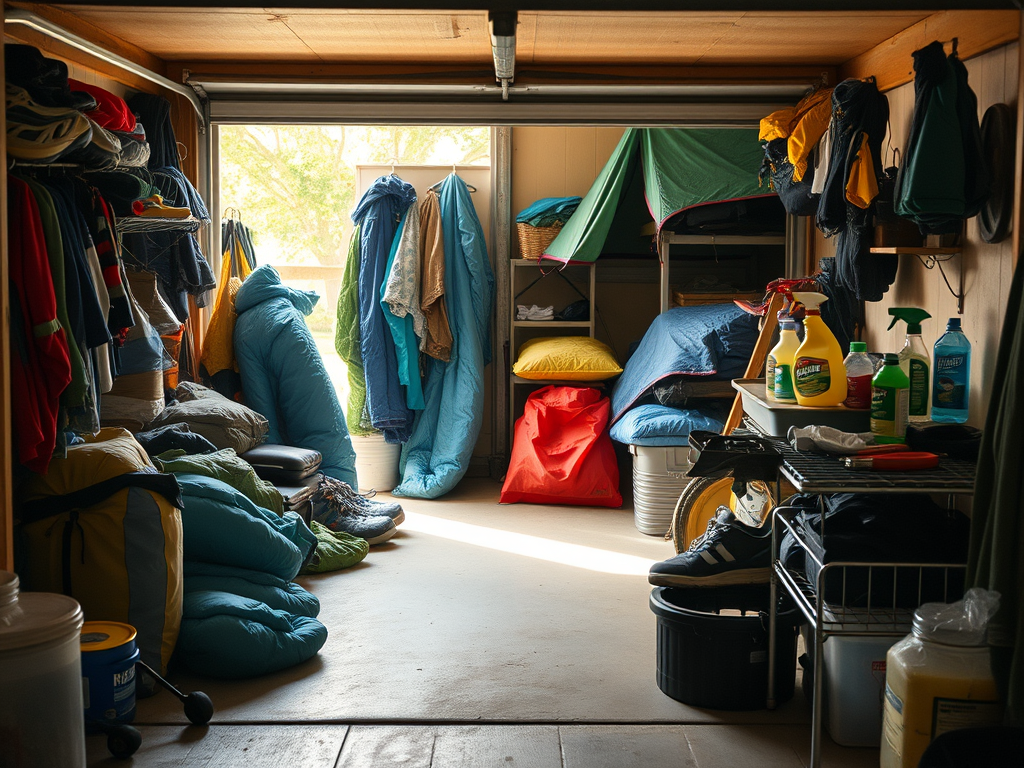
If it’s cold or rainy, the garage works just fine — just keep things off the floor so air can circulate. I’ll drape sleeping bags over chairs, hang rain gear on hooks, and spread the tent body out as flat as possible. Sometimes it looks like an REI exploded in my garage, but only for a day.
It takes maybe twenty minutes to spread things out, but it can save hundreds of dollars in ruined gear. And honestly? It saves the next trip, too. There’s nothing worse than arriving at camp, pulling out gear, and realizing you brought musty dampness with you.
Step 3: Quick Sort Before Cleaning (This Prevents Overwhelm)
Before I clean anything, I sort it into a few quick piles. This keeps me from bouncing around and getting overwhelmed halfway through.
- Soft goods: sleeping bags, blankets, towels, clothing layers
- Shelter gear: tent body, rain fly, footprint, stakes, guylines
- Kitchen + food: stove, utensils, cooler items, food bins
- Backpacks + extras: packs, headlamps, camp chairs, random kid treasures
Sorting takes five minutes and saves so much mental energy. It also makes it obvious what still needs to dry (because there’s always something hiding in a corner that’s damp).
Step 4: Clean Gently (Gear Doesn’t Need Perfection)
Once everything’s dry, it’s cleaning time. This part used to overwhelm me, but I’ve learned that gear doesn’t need to be scrubbed spotless — it just needs gentle care.
I use an eco-friendly cleaner that’s safe for outdoor fabrics and doesn’t leave residue. A quick wipe-down on tent floors, sleeping pads, and backpacks goes a long way. Think of it like resetting everything to “ready,” not trying to make it brand new.
For tougher messes (muddy tent stakes, sticky s’mores accidents, or the mysterious grime kids manage to spread everywhere), I keep an old toothbrush in my gear bin. It’s great for scrubbing zippers, seams, and little corners without damaging fabric.
Then I let everything air dry again before putting it away. The dry-clean-dry rhythm is annoying in the moment, but it’s the secret to gear that lasts.
And if you’re tempted to speed things up with harsh cleaners or strong scents — don’t. Strong detergent residue can affect waterproof coatings, attract dirt, and sometimes even irritate sensitive skin (especially for kids who touch everything).
Step 5: Don’t Skip the “Small Stuff” That Causes Big Problems
This is the step that used to get me. Tent stakes tossed into bins with wet dirt. Headlamps stored with dying batteries. Random snack crumbs hiding in backpacks. These small things are usually what make gear storage feel gross by the time spring rolls around.
Now I do a quick “small stuff sweep”:
- Shake out the tent footprint and brush dirt off stakes
- Open and empty every pocket of every backpack (yes, even the secret kid pockets)
- Wipe down lanterns and headlamps and remove batteries if they’ll sit for months
- Check the first aid kit for anything used or expired
It’s not a deep clean — it’s a reset. And it prevents the classic surprise of finding a smashed granola bar fused to the bottom of a bag six months later.
Step 6: Wash and Dry Clothing the “Outdoor Gear” Way
When I’m dealing with clothing and base layers, I wash them with a gentle, scent-free detergent, then skip the dryer. Hanging them to dry keeps fibers from breaking down, which means they’ll last longer — especially the merino layers I swear by for our fall trips.
This is one of those boring adult things that makes a huge difference. Heat and harsh detergents shorten the life of outdoor clothing fast. If you’ve ever had a “technical” shirt start pilling or a base layer lose its shape, you know what I mean.
My goal isn’t to baby the gear — it’s to keep it performing the way we need it to. Warm layers stay warm longer. Rain shells stay more water-resistant. Socks stay… sock-like.
Step 7: Store It Like You Want It to Still Work Next Season
After everything is clean and dry, the real magic happens: storing it so it stays that way.
For years, I used clear plastic bins, but recently I switched to these durable, opaque storage bins, and I’ll never go back. They’re sturdy, stack neatly, and keep dust and sunlight off the gear inside.
And maybe this is silly, but they also just look calmer — less visual clutter in the garage, more “organized family who totally has it together.” (Even if our lives are still a little chaotic.)
Each bin has a purpose: camping kitchen gear, sleeping gear, hiking extras, and one dedicated to kids’ stuff (because apparently, they need their own category). Inside, I toss a few odor absorber pouches to keep everything smelling fresh. They’re simple, natural, and perfect for spaces that tend to get stale over time.
The key to long-term freshness is breathability. I never seal things completely airtight — gear needs a little airflow to stay happy. Sleeping bags, for example, should never live compressed in their stuff sacks. I store ours in breathable storage bags, which help them stay lofty and warm year after year.
If you take one thing from this whole post, let it be this: dry + breathable storage is the difference between “ready to camp” and “why does this smell like a wet basement?”
Step 8: Give Your Gear a Quick “Check-Up” Once or Twice a Year
Once or twice a year, I give everything a quick check-up. It’s the same idea as a spring closet clean-out, but for gear. I pull out each bin, look for any signs of dampness, and make sure zippers, straps, and buckles are still working.
If something looks worn or has a small tear, I note it and fix it right away — or at least put it in the “fix soon” pile before it disappears into the abyss of good intentions.
This is also when I reapply waterproofing. Over time, tents, jackets, and even backpacks lose their water-repellent coating. A quick spray with this waterproofing treatment brings them back to life.
I usually do this outside on a mild day and let everything dry in the sun. It’s oddly satisfying to know my gear is ready for the next sudden downpour. But you only need to do this about once a year — sometimes even less — depending on how often you camp and how harsh the weather was.
And this is the step that saves money in the long run. Waterproof coatings, seams, and zippers all last longer when they’re maintained, not neglected until they fail.
Step 9: Why This Matters (More Than People Realize)
One thing I’ve learned: keeping gear fresh isn’t just about the items — it’s about the mindset.
When everything is clean, organized, and ready, it removes one big mental hurdle between you and your next adventure. You’re not digging through musty bins or wondering if the tent still smells weird; you’re just grabbing what you need and going.
There’s a surprising calm that comes from knowing your gear is prepped and cared for. It’s the same feeling I got after the day I finally took back my garage — that moment when chaos turned into calm. The difference now is that it’s not just organized, it’s preserved.
Because when spring rolls around again, you’ll be ready. No mystery smells. No unzipping a sleeping bag that’s lost its fluff. No wiping mildew off tent seams while your kids ask why you can’t leave yet.
Just the satisfying feeling of pulling out gear that looks, feels, and smells adventure-ready.
My Quick End-of-Season Gear Checklist
If you want the fast version (because sometimes we’re tired and life is loud), here’s the checklist I run through after our final trip of the season:
- Unload everything the same day
- Dry all damp items completely (tent, fly, bags, towels, shoes)
- Shake out dirt and pine needles before it gets ground in
- Wipe tent floor, sleeping pads, and packs with gentle cleaner
- Scrub zippers/stakes with an old toothbrush if needed
- Wash base layers gently and hang dry
- Store gear in sturdy bins with odor control
- Store sleeping bags uncompressed in breathable storage
- Do a quick gear check-up once or twice a year
- Reapply waterproofing occasionally (not constantly)
Closing Thoughts
When it comes time to pack again, your future self will thank you — especially when you’re preparing for a family camping trip and realize you’ve already done half the work.
Because keeping your gear fresh all year isn’t just about maintenance — it’s about making space for the kind of adventures that feed your soul, not drain your energy.
Clean gear, clear mind, open road. That’s the goal.
